dash griddle temperature guide pdf
Understanding Your Dash Griddle
Before diving into the temperature guide, understanding your Dash griddle’s components and features is essential. These griddles provide even heat distribution for optimal cooking results, typically featuring an adjustable temperature dial, a non-stick surface, and built-in indicators to monitor your cooking progress effectively and efficiently.
Dash Griddle Components and Features

Dash griddles are ingeniously designed to elevate your cooking experience, boasting a range of components and features that ensure optimal performance. Central to their appeal is the non-stick surface, which not only prevents food from adhering but also makes cleanup remarkably simple—often just requiring a quick wipe-down. These electric griddles are engineered for even heat distribution, a critical element for achieving consistently cooked meals, from perfectly golden pancakes to evenly seared meats. Many models incorporate an adjustable temperature dial, granting users precise control over cooking intensity, crucial for delicate items or high-heat searing. Furthermore, several Dash griddles come equipped with built-in indicators, such as indicator lights, that help monitor the cooking progress, enhancing user convenience. Features like a drip tray, seen in models like the 20-inch, 1500-watt Everyday Dash griddle, manage excess fats, promoting healthier cooking and easier maintenance. Some variations, including the Express and Mini Maker models, highlight portability and compact design, making them ideal for small spaces or on-the-go meals. They heat up in no time, showcasing their efficiency. An included recipe book often accompanies these appliances, offering inspiration and guidance. The robust construction and thoughtful design of each Dash griddle ensure a user-friendly and highly effective cooking tool for a variety of culinary tasks.
Adjustable Temperature Dial and Non-Stick Surface
The adjustable temperature dial is a cornerstone feature of Dash griddles, providing users with essential control over their cooking environment. This precise control is critical for achieving perfectly cooked results across a diverse range of foods. Whether you’re gently warming tortillas, expertly searing steaks, or preparing breakfast favorites like pancakes and eggs, the dial allows you to select the optimal heat setting, preventing undercooking or burning. This adaptability makes the Dash griddle incredibly versatile for various meals and recipes. Complementing this functionality is the superior non-stick surface, a standout characteristic designed to simplify your cooking and cleanup. Food effortlessly releases from the griddle, eliminating the need for excessive oils or fats, thus promoting healthier eating. As highlighted by users, the non-stick surface makes cleanup a breeze—often requiring just a quick wipe-down. This combination of precise temperature management and a convenient non-stick cooking area ensures a user-friendly and highly efficient appliance, ready to tackle anything from a quick snack to a full meal, enhancing your culinary endeavors with ease and consistency.
Even Heat Distribution for Optimal Results
The cornerstone of exceptional cooking on any griddle lies in its ability to distribute heat uniformly, and Dash griddles excel in this critical aspect. Engineered for optimal performance, these appliances ensure that the entire cooking surface maintains a consistent temperature from edge to edge. This even heat distribution is paramount for achieving perfectly cooked meals, eliminating frustrating hot and cold spots that often plague less advanced griddles. For instance, when preparing breakfast favorites, pancakes will brown beautifully and uniformly, and eggs will cook evenly without burnt edges or undercooked centers. Similarly, for grilled sandwiches or vegetables, every inch receives consistent heat, leading to thorough cooking and appealing textures. This meticulous design guarantees perfect sears, even cooking, and consistent results, elevating your culinary endeavors. The uniformity prevents the need for constant food rearrangement, allowing ingredients to cook precisely as intended. This foundational feature is what empowers users to confidently tackle a wide array of dishes, from delicate fish to robust steaks, ensuring every meal is cooked to perfection and enhancing the overall griddle experience.
Why the Dash Griddle Temperature Guide is Essential

The Dash Griddle Temperature Guide is a critical resource for optimal cooking. Proper temperature control is essential for perfectly cooked meals, whether making breakfast favorites or grilling sandwiches and vegetables. It ensures consistent results, elevating your culinary experience every time.
Critical for Achieving Perfectly Cooked Meals
Mastering the Dash griddle’s temperature is paramount for culinary success, directly impacting the quality of every dish. Proper heat management, as outlined in the essential Dash griddle temperature guide PDF, is not merely a suggestion but a critical foundation for achieving consistently perfect meals. This guide ensures that from delicate breakfast items like fluffy pancakes and perfectly set eggs to more robust fare such as seared steaks and flaky fish, each ingredient is cooked precisely. Without accurate temperature control, dishes can quickly become overcooked or undercooked, leading to uneven textures and compromised flavors. The PDF resource is designed to eliminate guesswork, providing specific temperature ranges that guarantee ideal cooking conditions. It enables users to achieve those coveted perfect sears, even browning, and thorough cooking without drying out food. This precision is vital for transforming everyday ingredients into extraordinary meals, building confidence in every cook’s ability to create professional-quality dishes right in their kitchen. Embracing the guide empowers you to consistently deliver delicious, perfectly prepared food, making every meal a triumph.
Ensuring Perfect Sears and Even Cooking
The Dash Griddle Temperature Guide PDF is an indispensable tool for guaranteeing perfect sears and remarkably even cooking across a diverse range of culinary creations. This vital resource meticulously outlines optimal heat settings, eliminating the guesswork often associated with griddle cooking. Achieving that coveted, deep golden-brown crust on pancakes or the rich, caramelized sear on a steak demands precise temperature control, which the guide expertly provides. It includes specific temperature ranges that ensure uniform cooking throughout, preventing common issues like hot spots that lead to uneven browning or undercooked centers. Whether you are aiming for beautifully grilled sandwiches, perfectly cooked eggs, or succulent fish, the PDF offers the critical knowledge to maintain consistent heat. This consistency is paramount for achieving professional-level results. The Dash griddle’s non-stick surface and inherent design for even heat distribution work in tandem with the guide’s recommendations, allowing ingredients to cook thoroughly and release effortlessly. By following these expert temperature settings, users can confidently produce dishes with impressive seared exteriors and perfectly cooked, moist interiors, elevating every meal.
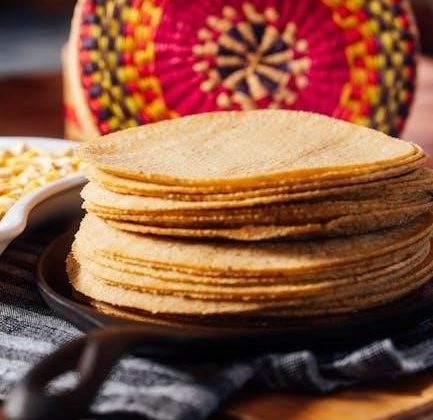
Cooking Breakfast Favorites to Grilled Sandwiches and Vegetables
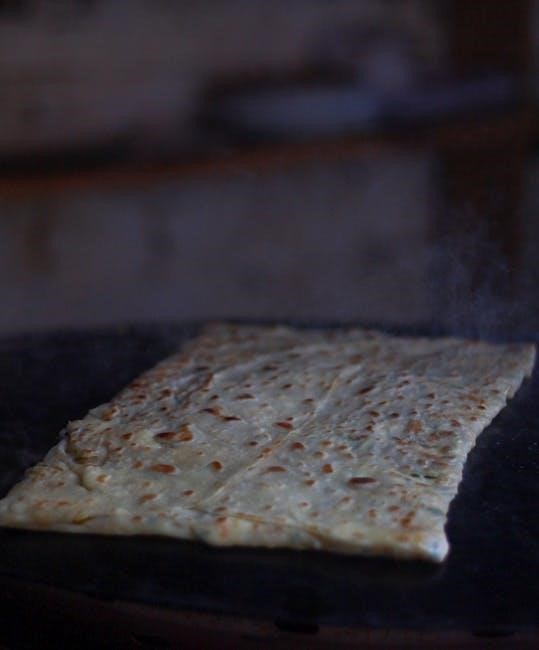
The Dash Griddle Temperature Guide PDF is invaluable for mastering an impressive range of culinary delights, from beloved breakfast staples to satisfying grilled sandwiches and fresh vegetables. Achieving the ideal texture for fluffy pancakes and perfectly cooked eggs—whether sunny-side up, scrambled, or over easy—hinges on precise temperature control, which the guide meticulously outlines. It provides specific heat settings that prevent burning while ensuring uniform cooking, allowing eggs to set beautifully and pancakes to achieve that desired golden-brown finish without sticking. Beyond the morning rush, this comprehensive resource extends the griddle’s capabilities to crafting flawless grilled sandwiches, crispy quesadillas, and tender, flavorful vegetables. Imagine perfectly toasted bread with gooey melted cheese, or vibrant asparagus and bell peppers cooked to an ideal crisp-tender doneness. The guide ensures that each ingredient receives the appropriate heat for optimal results, enhancing flavors and textures across the board. This empowers users to confidently prepare a diverse menu, guaranteeing delicious outcomes for everything from a speedy weekday breakfast to an elaborate weekend brunch or a quick, healthy dinner.

The Dash Griddle Temperature Guide PDF Explained
The Dash Griddle Temperature Guide PDF is a comprehensive resource, offering detailed insights into optimal heat settings for various foods. It includes specific temperature ranges for perfect sears and even cooking, providing users with the knowledge and confidence to cook a wide range of dishes with precision and ease.
Detailed Optimal Heat Settings for Various Foods
The Dash Griddle Temperature Guide PDF serves as an invaluable tool, offering detailed insights into the optimal heat settings required for a diverse array of culinary creations. This comprehensive resource meticulously outlines specific temperature ranges, ensuring that whether you’re preparing delicate breakfast items or robust main courses, your results are consistently perfect. For instance, the guide provides precise recommendations for achieving fluffy pancakes and perfectly set eggs, preventing overcooking or undercooking. Beyond breakfast staples, it extends to more intricate dishes like searing steaks to a beautiful crust while maintaining internal juiciness, or perfectly flaking fish without drying it out. The detailed guidance empowers users with the knowledge to adapt their griddle’s temperature dial with confidence. It emphasizes the importance of these specific settings for achieving flawless sears, thorough and even cooking, and ultimately, an enhanced dining experience. By following these expert-calibrated temperatures, home cooks can eliminate guesswork, transform their cooking, and consistently deliver restaurant-quality meals right from their Dash griddle, across a wide spectrum of ingredients and preparations, maximizing the potential of their appliance for every meal.

Specific Temperature Ranges for Eggs, Pancakes, Steaks, and Fish
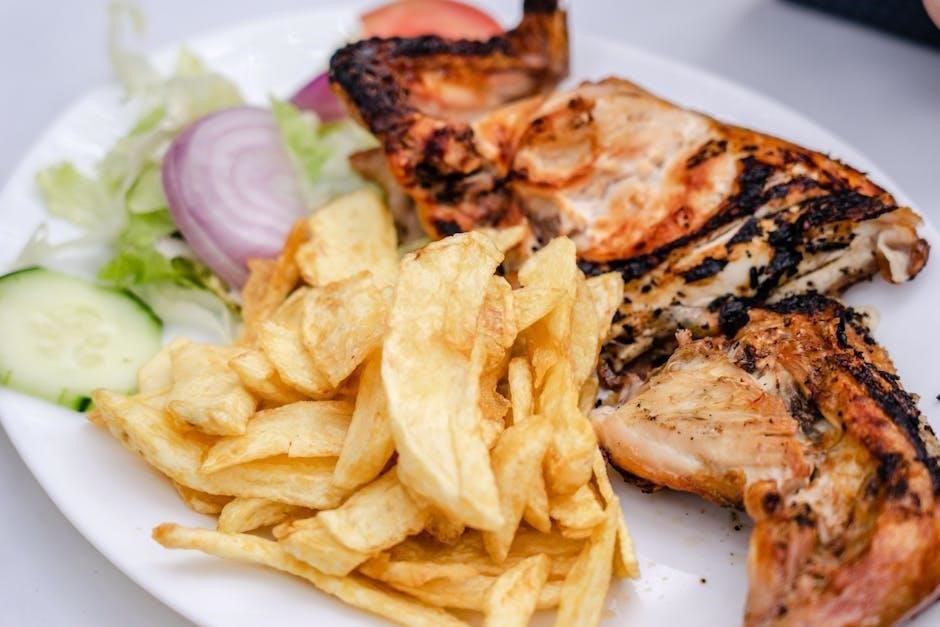
The Dash Griddle Temperature Guide PDF meticulously breaks down the precise heat requirements for common culinary staples, ensuring optimal results for every dish. For eggs, whether scrambling, frying, or crafting omelets, the guide specifies a low to medium-low range, typically around 250-275°F, preventing rubberiness and promoting a tender, creamy texture. This precision guarantees perfectly cooked whites and yolks without scorching. When preparing pancakes, a consistent medium heat, often in the 325-350°F range, is recommended; This allows for even browning and thorough cooking throughout, resulting in golden, fluffy pancakes that are never doughy in the center. For searing steaks, the guide advises a higher initial temperature, frequently between 375-400°F, to achieve that coveted crust and rich flavor, with subsequent adjustments for desired internal doneness. Finally, for delicate fish, a medium-high setting, approximately 350-375°F, is crucial. This ensures a crisp exterior while preserving the fish’s delicate texture and preventing it from sticking. Adhering to these specific ranges outlined in the PDF eliminates guesswork, transforming everyday cooking into a consistent, professional-level experience, making every meal a triumph of temperature control and culinary precision.
Comprehensive Resource for Precision and Ease
The Dash Griddle Temperature Guide PDF stands out as a truly comprehensive resource, meticulously designed to empower users with both the knowledge and unwavering confidence needed to cook an extensive array of dishes with remarkable precision and ease. This invaluable document transcends a mere list of temperatures; it serves as a central hub of culinary intelligence, eliminating guesswork and transforming every cooking session into a predictable and enjoyable experience. By consolidating optimal heat settings for everything from delicate breakfast items to robust main courses, the guide ensures consistent, high-quality results without the frustration of trial and error.
It demystifies the art of griddle cooking, providing clear, actionable insights that allow even novice chefs to achieve professional-level outcomes. Users gain the ability to perfectly sear, sauté, and grill, confident that their temperature adjustments are aligned with expert recommendations. This comprehensive approach simplifies complex cooking techniques, making a wide range of recipes accessible and achievable. Ultimately, the PDF acts as an essential companion, fostering a deeper understanding of heat dynamics and enabling effortless culinary mastery, turning every meal preparation into a testament to its unparalleled utility and remarkably straightforward guidance.
Downloading and Mastering Your Dash Griddle Temperature Guide PDF
Accessing your free Dash Griddle Temperature Guide PDF is the first step to culinary excellence. Download it now to master perfect cooking temperatures and achieve delicious results every time with expert tips. Become a griddle master and cook like a pro effortlessly.

Accessing Your Free Dash Griddle Temperature Guide PDF
Accessing your free Dash Griddle Temperature Guide PDF is a straightforward process designed to immediately elevate your cooking experience. This invaluable resource is readily available online, offering an easy-to-follow guide to unlock the full potential of your Dash griddle. By downloading this comprehensive PDF, you gain instant access to detailed insights into optimal heat settings for a wide array of foods. Whether you’re aiming for perfectly cooked eggs, fluffy pancakes, a precise sear on steaks, or flaky fish, this guide provides specific temperature ranges to ensure consistent and delicious results. It serves as your personal culinary coach, providing the knowledge and confidence needed to cook a diverse range of dishes with remarkable precision and ease. The convenience of having this expert guide at your fingertips means you can quickly reference ideal temperatures, eliminating guesswork and significantly improving your overall cooking outcomes. Simply locate the download link, click, and save this essential document to your device. This immediate availability empowers you to start grilling like a pro and master perfect cooking temperatures without delay. Don’t miss this incredible opportunity to transform your everyday meals into culinary masterpieces with confidence.
Mastering Perfect Cooking Temperatures with Expert Tips
Achieving culinary excellence on your griddle relies heavily on mastering precise temperature control, a skill made accessible through your comprehensive guide. This essential PDF equips you with expert tips to consistently hit the ideal heat settings for every dish, transforming your cooking. By diligently following the specific temperature ranges provided for diverse foods—from delicate eggs and fluffy pancakes to robust steaks and tender fish—you ensure perfect sears, even cooking, and optimal texture every time. The guide emphasizes the critical importance of proper heat management, moving beyond guesswork to a scientific approach. Learn to interpret your griddle’s responses to different settings, understanding how slight adjustments can dramatically impact browning, crispness, and internal doneness. Expert tips within the guide will teach you to utilize the griddle’s features, like its adjustable dial and even heat distribution, to your advantage. This mastery extends to perfecting breakfast favorites, grilling savory sandwiches, and preparing vibrant vegetables, ensuring each meal is cooked to perfection. Embrace these professional insights to elevate your everyday cooking, making every griddle creation a testament to precise temperature mastery and delicious results. This resource truly empowers you to become a confident griddle master.
Becoming a Griddle Master with the PDF Guide
Embark on your journey to becoming a true griddle master, leveraging the indispensable insights found within your Dash Griddle Temperature Guide PDF. This comprehensive resource is meticulously designed to instill in you the knowledge and unwavering confidence required to cook an expansive range of dishes with unparalleled precision and remarkable ease; No longer will you face uncertainty in the kitchen; instead, you will be equipped to consistently achieve those coveted perfect sears, distinct grill marks, and uniformly cooked results that elevate every meal. The guide serves as your personal culinary mentor, empowering you to confidently prepare everything from delicate breakfast favorites like fluffy pancakes and perfectly set eggs to more ambitious endeavors such as succulent steaks, tender fish, gourmet grilled sandwiches, and vibrant, crisp vegetables. It simplifies the art of temperature control, transforming what might seem complex into an intuitive and thoroughly enjoyable process. With its specific temperature ranges tailored for various foods, you are assured of even cooking and consistently flawless outcomes. Download this essential PDF today, absorb its expert tips, and unlock your full potential. You will not only master cooking temperatures but also gain the confidence to create delicious, perfectly executed meals, truly becoming a griddle master.

Enhancing Your Dash Griddle Experience
To truly enhance your Dash Griddle experience, leverage its smart design. Utilize built-in indicators for progress monitoring, ensuring quick heating and easy non-stick cleanup. Access user manuals and specifications to unlock full potential, guaranteeing perfect results with every use.
Utilizing Built-In Indicators for Monitoring Progress
Dash griddles are ingeniously designed with user convenience in mind, and a key aspect of this thoughtful engineering is the inclusion of built-in indicators for monitoring cooking progress. These subtle yet effective features provide crucial visual cues, empowering you to achieve perfectly cooked meals with greater confidence and precision. Instead of relying solely on guesswork or constant lifting of food, the griddle’s integrated indicators signal important stages in the cooking process. For instance, a common indicator is a light that illuminates when the griddle has reached its set temperature, letting you know it’s preheated and ready for food placement. This eliminates the uncertainty of cold spots or premature cooking, ensuring your ingredients hit the optimal heat from the start. Furthermore, some models might feature indicators that subtly change to suggest when food is nearing completion or when the surface is cooling down. These visual aids are invaluable for beginners and seasoned cooks alike, streamlining the cooking experience and significantly reducing the likelihood of over or undercooking. By paying attention to these built-in signals, you transform your griddle into a more intuitive and responsive cooking appliance, leading to consistently delicious results. They are integral to maintaining the even heat distribution Dash griddles are known for, helping you master precise timing for everything from delicate eggs to robust grilled sandwiches. Utilizing these indicators makes your cooking journey smoother and more enjoyable.
Accessing Dash Griddle PDF User Manuals and Specifications
To fully enhance your Dash griddle experience, accessing the official PDF user manuals and detailed specifications is an invaluable step. These comprehensive documents provide much more than just basic operational instructions; they are crucial resources for understanding every facet of your appliance’s design and functionality. Whether you own a Dash DEG200, an Everyday DEG205, or any other model, finding its specific manual can unlock a deeper appreciation for its capabilities and proper use. You can typically view and download these instruction and recipe manuals online, often directly from the manufacturer’s support pages or reputable appliance documentation sites, making access straightforward. Within these PDFs, you’ll discover essential information such as assembly guides, precise cleaning procedures, effective troubleshooting tips for common issues, and even included recipe ideas to inspire your culinary adventures and expand your repertoire. Beyond basic usage, the specifications section offers critical insights into power consumption, exact dimensions, and material composition, all of which contribute to a complete and thorough understanding of your particular griddle model. Leveraging these readily available PDF resources empowers you to maintain your appliance optimally, troubleshoot minor issues independently with confidence, and ultimately maximize its longevity and consistent performance, ensuring you get the absolute most out of every cooking session and truly master your Dash griddle with ease.
Quick Heating and Easy Non-Stick Cleanup
One of the most appreciated features of Dash griddles is their remarkable ability to heat up in no time, providing instant readiness for your cooking needs. This rapid heating capability is a significant advantage, particularly for busy mornings when preparing breakfast favorites like pancakes and eggs quickly is paramount. Whether you’re using a full-sized electric griddle or a compact Dash Mini Maker, the efficient heating element ensures you spend less time waiting and more time enjoying perfectly cooked meals. This quick warm-up also makes the griddle incredibly convenient for on-the-go meals or snacks, fitting seamlessly into any schedule.
Complementing its speedy performance is the superior non-stick surface, which truly makes cleanup a breeze. After cooking, food residue simply wipes away, eliminating the need for arduous scrubbing or soaking. This non-stick coating not only ensures effortless food release during cooking but also guarantees an incredibly easy post-meal cleanup, often requiring just a simple wipe-down with a damp cloth once cooled. Maintaining the cleanliness of your griddle is crucial for its longevity and optimal performance, and the thoughtful design of Dash griddles with their non-stick surfaces directly supports this. This combination of quick heating and simple, non-stick cleanup significantly enhances the overall user experience, making cooking and maintenance efficient and enjoyable.