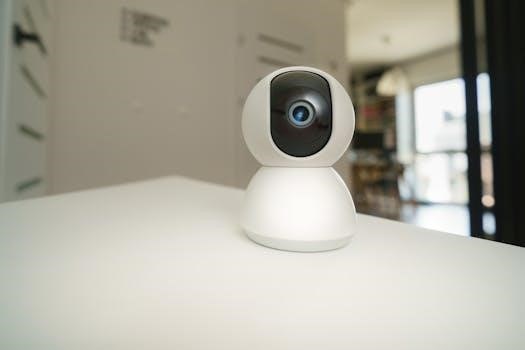
Unboxing and Initial Setup
Upon receiving your package‚ carefully unbox the Mini Cube Spy Camera. Ensure all components are present‚ including the camera‚ mounting accessories‚ and an 8GB microSD card‚ as sometimes included.
To start the setup process‚ find the user manual. This will provide detailed instructions on how to operate the camera‚ including specific information regarding its functions and features.
Checking Package Contents
Carefully open the box and verify that all listed items are included. Typically‚ you should find the Mini Cube Spy Camera itself‚ along with mounting accessories necessary for its placement. Check for an 8GB microSD card‚ which is sometimes included for immediate recording capabilities. Make sure no components are missing before proceeding with the setup. Also confirm that the user manual is present within the packaging before starting.
Locating User Manual
The user manual is an essential resource for setting up and operating your Mini Cube Spy Camera. It contains crucial details about the camera’s features and functions. Look for a printed booklet or a card included in the packaging. This manual provides instructions on initial setup steps‚ button operations‚ and guidance on accessing advanced features‚ so you must find it before any further procedures. Make sure to read through it thoroughly for important information.
Powering and Charging
You can charge the mini camera by connecting it to your PC via USB. Ensure the camera is not recording during charging. This method also allows data transfer.
Alternatively‚ use a 220V charger or a portable 5V charger to power the camera. Charging this way can allow continuous use of the mini camera while it charges.
Using USB Connection to PC
To charge the mini cube camera using a computer‚ connect it via the provided USB cable. Ensure that the device is not actively recording video before you connect it to the computer. The USB connection will initiate the charging process using your computer’s power supply. This method is useful for both charging the device and transferring files stored on the camera’s memory card to your computer‚ as well as accessing the configuration files.
Using a Charger from 220V Network
You can charge your mini cube camera by connecting it to a charger from a 220V network or a portable 5V charger. This method allows you to charge the camera even while recording‚ providing uninterrupted power. Ensure the charger you are using is compatible with the camera’s specifications. This approach provides a faster charging option than a standard USB connection to a computer‚ as well as being more convenient for continuous operation.
Memory Card Installation
Before using the camera‚ insert a microSD card. This allows you to save video clips locally and use the continuous recording function. Ensure the card is inserted correctly.
To check the storage size of your microSD card‚ refer to the user manual. This step helps you ensure the card is compatible and has enough space for your recordings.
Inserting a MicroSD Card
To begin‚ locate the designated slot for the microSD card on your Mini Cube camera. Gently insert the microSD card into the slot‚ ensuring it is correctly aligned. A slight click or resistance may indicate that it has been properly inserted. This step is crucial‚ as the camera relies on the memory card to store video recordings and images. Failure to insert the card properly may hinder recording functionality.
Checking Storage Size of MicroSD Card
To verify the storage size of your inserted microSD card‚ you will typically need to connect the camera to a computer via USB. Once connected‚ navigate to the storage device associated with the camera and check its properties. Alternatively‚ some camera apps may display the storage capacity within the app’s settings menu. The camera supports microSD cards up to 32GB‚ so ensure that your card falls within this limit for optimal performance.
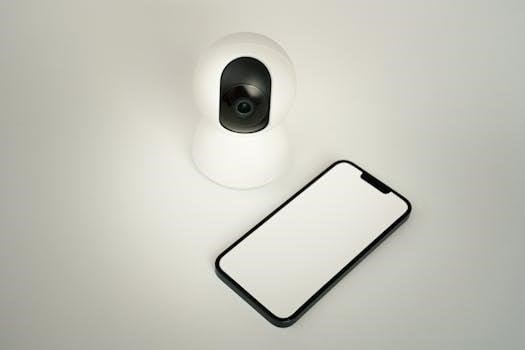
Connecting to Mobile App
To pair‚ download the camera’s app. Then‚ follow the app’s instructions to connect to the camera. This usually involves connecting to the camera’s Wi-Fi signal.
Once paired‚ you can modify camera settings via the app. You can adjust settings such as video resolution‚ motion detection‚ and night vision functionality within the app’s interface.
Pairing with the Camera App
To begin‚ download the designated app for your mini cube camera from your device’s app store. Next‚ ensure your camera is powered on and ready to pair. Open the app and locate the option to add a new device or connect to a camera. Follow the on-screen instructions‚ which often involve selecting the camera’s Wi-Fi network and entering a password if required‚ to establish a secure connection between your phone and the camera. This will enable you to control the device.
Modifying Camera Settings via App
Once your mini cube camera is paired with the mobile application‚ you can easily access and modify various settings. The app interface allows you to adjust video resolution‚ choosing between options like 720p and 1080p. You can also enable or disable features like motion detection and loop recording. Additionally‚ the app provides controls for night vision settings‚ ensuring optimal performance in different lighting conditions. Furthermore‚ it allows for the setup of time watermarks‚ all conveniently done through your smartphone.
Recording and Playback
To initiate recording‚ press the On/Off button once. To stop recording‚ press the On/Off button again. The LED indicator light will blink during video capture.
Connect the camera to a computer via USB or insert the microSD card into a reader to view recorded videos and photos. Files can be accessed directly.
Starting and Stopping Recording
To begin recording video‚ press the On/Off button once when the camera is powered on and in standby mode. The blue LED indicator will blink three times‚ indicating that recording has started. To stop recording‚ press the On/Off button again. The camera will save the video file and return to standby mode. Ensure the device is not recording before powering it off.
Viewing Recordings from SD Card
To view recorded videos‚ you can either connect the mini cube camera to your computer using a USB cable or remove the microSD card and insert it into a card reader. Access the video files through your computer’s file explorer. Alternatively‚ use the camera app on your phone to view the recordings if the camera is paired. Ensure your device supports the file format.
Night Vision Function
To enable night vision‚ power on the camera and wait for the blue LED indicator. The camera will automatically switch to night vision mode in low light conditions.
You can record in both 720P and 1080P resolutions while using night vision. Activate recording as usual‚ and the camera will capture video using its infrared capabilities.
Enabling Night Vision Mode
To activate the night vision feature on your mini cube camera‚ first ensure the device is powered on. Usually‚ a blue LED indicator will light up to show it’s ready. The night vision function typically engages automatically in low-light conditions. There’s generally no separate button; the camera intelligently switches to night mode‚ using its infrared capability. This transition allows for recording even in dark environments‚ ensuring continuous surveillance.
Recording in 720P and 1080P with Night Vision
Your mini cube camera can record in both 720P and 1080P resolutions‚ even when using night vision. To record in 720P‚ power on the device‚ and a blue light will indicate it is in standby mode. Press the On/Off button once to begin recording. For 1080P recording‚ the process is very similar‚ usually involving a different button press or mode selection. Both resolutions are available while night vision is active‚ ensuring clear recordings in low-light conditions.

Additional Features
The mini cube camera includes motion detection‚ recording only when movement is detected. This feature helps conserve storage and battery life‚ capturing only relevant footage.
Loop recording is also included‚ which overwrites older footage when the memory card is full‚ ensuring continuous recording without manual intervention.
Motion Detection Recording
The motion detection feature on the mini cube camera is designed to initiate recording only when movement is detected within its field of view. This functionality is beneficial for conserving both battery life and storage space on the microSD card. By activating this mode‚ the camera will not record continuously but will only capture footage when there is actual activity‚ making it more efficient for surveillance purposes. The sensitivity can often be adjusted via the camera’s app.
Loop Recording Function
The loop recording function of the mini cube camera allows for continuous recording‚ even when the memory card is full. When enabled‚ the camera will automatically overwrite the oldest recorded files with new footage. This feature is useful for uninterrupted surveillance‚ ensuring that the camera is always recording the latest events. It eliminates the need to manually manage storage space and provides a seamless recording experience.
Time Watermark Setup
To set the time watermark‚ connect the camera to your computer via USB. Locate and open the ‘TIMEREST.txt’ file and edit the date and time information.
After saving the changes in the document‚ start the camera and record a video. The saved time will now display as a watermark on the recorded footage.
Editing TIMEREST.txt Document
To customize the time watermark‚ first‚ power off the camera. Then‚ connect it to your computer using a USB cable. Access the camera’s storage and find the ‘TIMEREST.txt’ file. Open this file with a text editor‚ and modify the date and time format‚ such as ‘20250131134726 Y’ to your desired settings. Save the changes‚ ensuring that the format remains consistent. This will update the time displayed on your videos.
Displaying Time Watermark on Video
After editing the ‘TIMEREST.txt’ file and saving your changes‚ safely disconnect the camera from your computer. Power on the mini cube camera and begin recording a video. The time watermark will now be displayed on your video‚ reflecting the time settings you entered in the text file. This timestamp will be visible throughout the video recording‚ providing a clear indication of the recording date and time.
Network Camera Functionality
The network camera logs all user access‚ providing a list of currently connected users. This feature enhances security and allows monitoring of who is accessing the camera’s feed.
The camera offers full frame rate video streaming over HTTPS‚ ensuring secure video transmission and protecting your privacy while viewing the live feed from the camera.
User Access Logging
This mini cube camera includes a user access logging feature‚ which meticulously records all instances of user connections. It provides a detailed list of each user currently connected to the camera’s network‚ enhancing security and allowing administrators to monitor who is accessing the video feed at any given time. This log is crucial for maintaining accountability and identifying any unauthorized access attempts‚ ensuring your surveillance is secure and private.
HTTPS Video Streaming
This mini cube camera offers HTTPS video streaming‚ ensuring a secure and encrypted transmission of video data. This feature is vital for protecting your surveillance feed from unauthorized interception or tampering. The use of HTTPS adds an additional layer of security‚ making it more difficult for malicious actors to access and view the camera’s video stream‚ thus safeguarding your privacy. This also guarantees the integrity of the data during transmission.

Troubleshooting
To power off the camera‚ ensure it is not recording. Then‚ press and hold the power button for six seconds until the device shuts down completely.
If the camera malfunctions‚ use the reset button. This will restore the device to its default factory settings and help resolve any operational issues.
Powering Off the Camera
To ensure the mini cube camera is completely powered off‚ first‚ confirm that it is not currently recording any video. If the device is recording‚ press the record button to stop the recording process. Then‚ press and hold the power button located on the camera for approximately six seconds. The device will then power off‚ indicated by the LED lights turning off‚ saving battery power.
Using the Reset Button
If you encounter issues with the mini cube camera’s performance‚ locating and using the reset button can be a helpful step. Typically‚ this button is a small recessed button‚ often requiring a pin or paperclip to press. When the camera is on‚ gently press and hold the reset button for a few seconds. This action will reset the device to its factory default settings‚ which can resolve many common problems.